Building a 3D AI assistant using React Native and GPT-Realtime
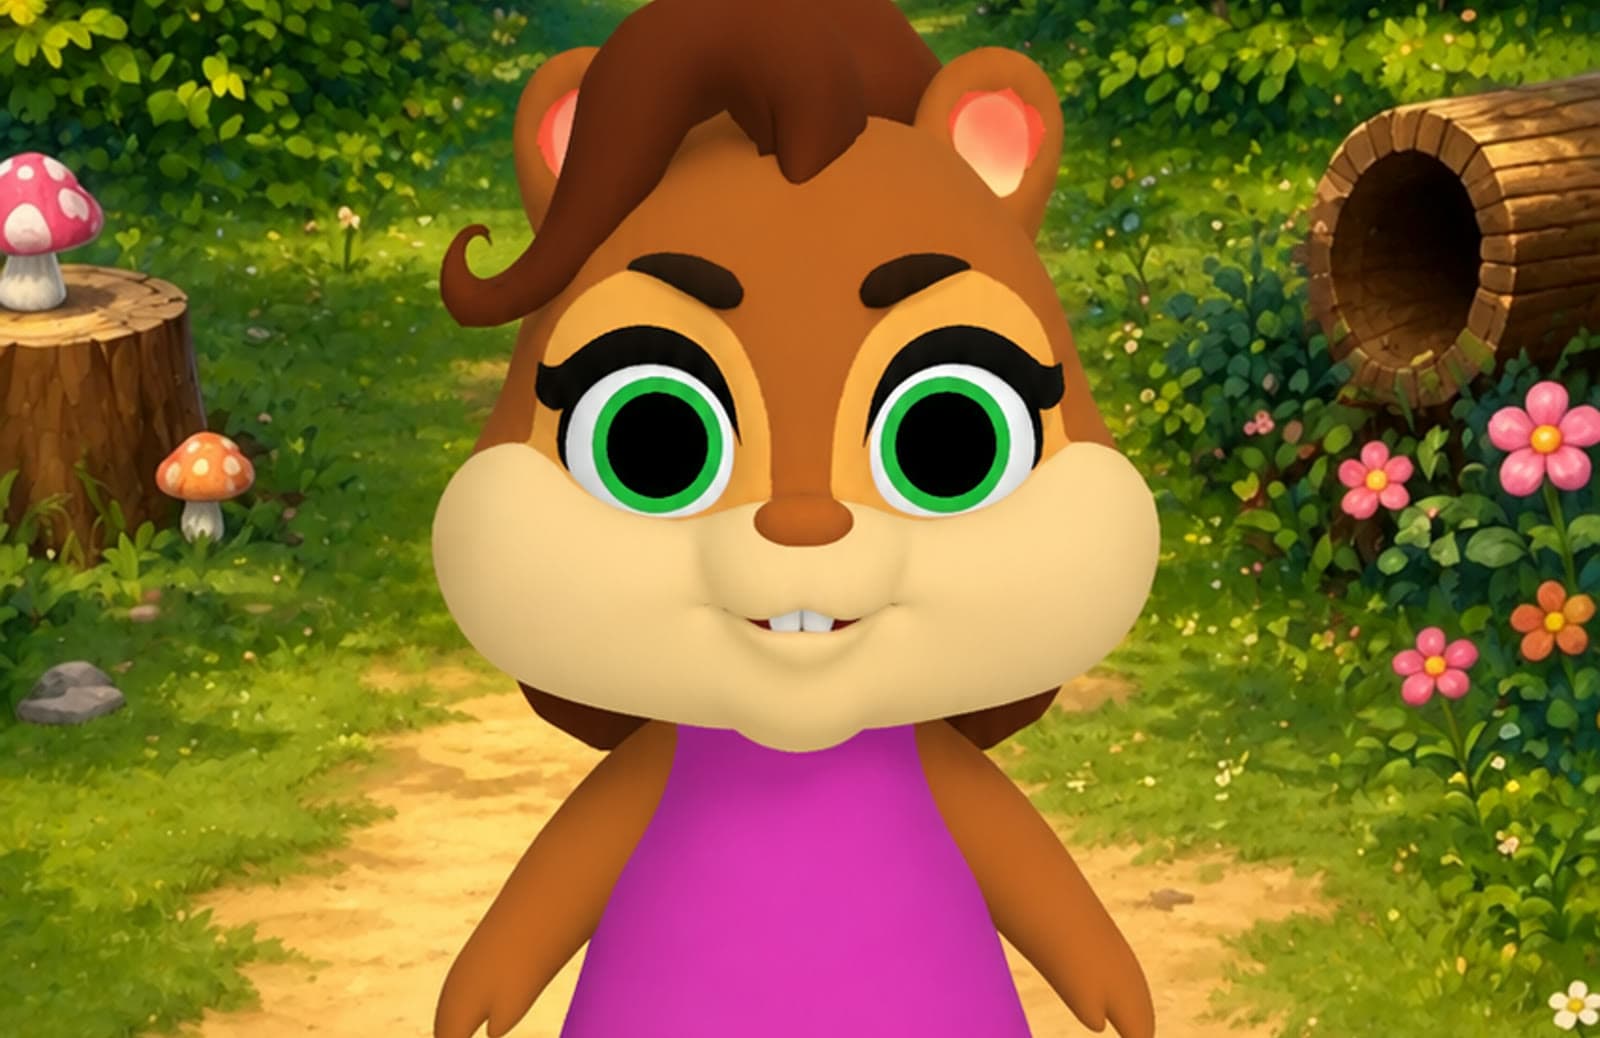
A conversational 3D character built in React Native: a Filament-rendered squirrel voiced by OpenAI's gpt-realtime over native WebSockets, with amplitude-driven lip sync and tool calls that write to your real calendar.
Dave Mkpa-Eke
Software Engineer @ Margelo
If you grew up playing mobile games, there's a good chance you've met Talking Tom. For those who haven't, the Talking Tom and Friends franchise featured a tappable 3D character that spoke back things you said and displayed cool, fun animations.
It is speculated that the Talking Tom game series has been downloaded over 23 billion times, which is a testament to how popular and lucrative that category of mobile apps is. Today we will be building something somewhat similar, but with a few interesting tweaks that make it serve a different purpose. In today's tech industry we have something the developers of the original versions of Talking Tom didn't have, and it's called generative AI. Before you roll your eyes at "yet another blog post about AI slop", walk with me, because we will be using gpt-realtime from OpenAI to make the 3D character truly conversational (with a live voice) and also able to carry out tasks via tool-calling.
Tool calling refers to the ability of artificial intelligence (AI) models to interact with external tools, application programming interfaces (APIs) or systems to enhance their functions. Source
Furthermore, our app, which will be built using React Native, is going to be called AvatarAssist. The idea is a 3D AI character assistant that will answer our questions about animals and also help us schedule visits to the zoo by interacting with our mobile calendars programmatically.
Okay then, let's begin!
Bringing the model to life
As already stated above, our app will feature a conversational 3D character, but how do we render a 3D character in a React Native app? We'll do that using react-native-filament built by us here at Margelo!
react-native-filament is a React Native port of Filament, a real-time physically based rendering engine for Android, iOS, Windows, Linux, macOS, and WebGL2 by Google.
Our 3D model is a pre-made asset, "Cute Character with Animations" by Ivana Boskovic, downloaded from Sketchfab under CC-BY-4.0. It ships as a .glb: a single binary file holding the mesh, its skeleton, the textures, and every animation clip the artist authored. That last part matters more than it sounds, and we'll come back to it.
Getting the model on screen takes three pieces. FilamentView is the surface Filament renders into, useModel loads the asset, and ModelRenderer puts the loaded model into the scene:
import {FilamentView, ModelRenderer, useModel} from 'react-native-filament';

export function SquirrelScene() {
  const model = useModel(require('../../assets/squirrel.glb'));

  return (
    <FilamentView style={StyleSheet.absoluteFill}>
      <ModelRenderer model={model} />
    </FilamentView>
  );
}
useModel is asynchronous, and it reports where it is via model.state. Ours is a 1.8 MB file that takes a few hundred milliseconds to parse and upload to the GPU, so there is a real window where the scene is mounted but empty. We use that state later to decide when the app is actually ready to show, rather than showing an empty forest.
Now, about those animation clips. Our squirrel arrived with twenty of them: idle, happy, happy.001 through happy.006, four variations of touch me, hungry, kupanje, and so on. We use exactly two: idle, which loops forever, and happy welcome 2, the wave it gives you when it starts talking for the first time.
useAnimator gives us the handle for playing them, and it can tell us how long each clip runs, so we don't have to hardcode durations that would silently break if the artist re-exported the model:
const animator = useAnimator(model);

useEffect(() => {
  if (animator != null && animator.getAnimationCount() > IDLE_ANIM) {
    idleDuration.value = animator.getAnimationDuration(IDLE_ANIM);
    waveDuration.value = animator.getAnimationDuration(WAVE_ANIM);
  }
}, [animator, idleDuration, waveDuration]);
Playing them is where it gets interesting, because we don't do it from React. Filament gives you a render callback that fires once per frame, and it runs as a worklet on the UI thread, not on the JS thread. Inside it we keep our own clock per clip and decide, every frame, which clip to show and how far into it we are:
RenderCallbackContext.useRenderCallback(({timeSinceLastFrame}) => {
  'worklet';

  // A wave was requested: start its clock and clear the request.
  if (waveRequested.value > 0 && waveClock.value < 0) {
    waveClock.value = 0;
    waveRequested.value = 0;
  }

  let clipIndex = IDLE_ANIM;
  let clipTime = 0;

  if (waveClock.value >= 0) {
    waveClock.value += timeSinceLastFrame;
    if (waveClock.value < waveDuration.value) {
      clipIndex = WAVE_ANIM;      // wave takes over while it runs
      clipTime = waveClock.value;
    } else {
      waveClock.value = -1;       // done, fall back to idle
    }
  }

  if (waveClock.value < 0) {
    idleClock.value += timeSinceLastFrame;
    clipTime = idleClock.value % idleDuration.value;  // loop
  }

  animator.applyAnimation(clipIndex, clipTime);
  animator.updateBoneMatrices();
});
So the idle clip loops by taking the clock modulo its own duration, and a wave simply preempts it until its clock runs past the wave's length. One clip at a time, chosen per frame.
The clocks advance by timeSinceLastFrame, which the callback hands us, so the clips run at the same speed whether the display is 60Hz or 120.
The part worth dwelling on is waveRequested. It's a shared value, which means the JS side can set it to 1 from anywhere, and this loop picks it up on the very next frame without a single React re-render. That matters here: our character has to keep animating at 60fps while the app is doing genuinely heavy work, like decoding streamed audio from a model.
Pointing a camera at the model
A model in a scene isn't a picture yet. Something has to decide where you're standing and what lens you're looking through, and in Filament that's the camera. useFilamentContext gives us the one belonging to our view:
const {camera, view} = useFilamentContext();
We want two things from it. The model should sit nicely in frame, and the user should be able to spin it around by dragging. Both happen in a render callback again, for the same reason as before: dragging a finger across the screen should move the camera on the frame the finger moves.
Framing is a lens choice. We give the camera a 35mm focal length, which is wide enough to fit the model in without the fisheye look a shorter lens gives you:
camera.setLensProjection(35, aspect, 0.1, 100);
The aspect is where a small trap lives. The projection depends on the view's aspect ratio, so it has to be rebuilt whenever that changes: rotating the device, the keyboard opening, a window resizing on a tablet. It would be easy to just call setLensProjection every frame and never think about it again, but that's rebuilding a projection matrix to get the same answer. So we keep the last aspect ratio in a shared value and only rebuild when it actually moves:
const aspect = view.getAspectRatio();
if (prevAspect.value !== aspect) {
  prevAspect.value = aspect;
  camera.setLensProjection(FOCAL_MM, aspect, NEAR, FAR);
}
Then the orbit. Rather than rotate the model, we move the camera around it, which keeps the lighting and the shadow exactly where they are. The camera lives on a sphere: radius away from a target point, at whatever angle the user has dragged to, always looking back at the target:
const eye: [number, number, number] = [
  tx + radius * Math.cos(vertical) * Math.sin(horizontal),
  ty + radius * Math.sin(vertical),
  tz + radius * Math.cos(vertical) * Math.cos(horizontal),
];
camera.lookAt(eye, [tx, ty, tz], [0, 1, 0]);
Our target is [0, 2.65, 0] rather than the origin, so the camera looks at the model's chest instead of the floor at its feet.
One detail in that snippet is doing more than it looks. The horizontal angle isn't one value, it's the sum of two:
const horizontal = horizontalTurn.value + gyroHorizontalTurn.value;
One comes from dragging, the other from the phone's gyroscope, and adding them means tilting the device parallaxes the scene slightly while a drag still works on top of it.
That second one is worth unpacking, because the scene moving as you tilt the phone is one of those touches that's quite nice. It comes from the gravity sensor, read through Reanimated:
const gravity = useAnimatedSensor(SensorType.GRAVITY, {
  interval: 'auto',
  adjustToInterfaceOrientation: true,
});
Gravity rather than the gyroscope's rotation rate, because gravity tells us which way is down, and therefore how the phone is being held right now. We normalise the vector, take its horizontal component, and compare that against whatever the orientation was when the app started, so "no tilt" means however the user happens to be holding it rather than perfectly flat:
const normalizedX = gravityVector.x / magnitude;
if (baseX.value == null) {
  baseX.value = normalizedX;      // first reading becomes the resting pose
}
const deltaX = normalizedX - baseX.value;
That delta does two jobs. It becomes the gyroHorizontalTurn above, nudging the camera so tilting reveals a little more of one side of the model. And it slides the forest behind it by a few pixels:
const bgSwayStyle = useAnimatedStyle(() => ({
  transform: [{scale: BG_OVERSCAN}, {translateX: sway.value}],
}));
The scale there is load-bearing. If the background were exactly the size of the screen, sliding it sideways would drag an empty edge into view, so we render it slightly larger than it needs to be and slide within the slack.
The sway is smoothed rather than tracked exactly, too, because raw sensor values are jittery enough to make the whole scene shiver:
sway.value += (targetSway - sway.value) * SWAY_SMOOTH;
Putting the model somewhere
Our Filament scene contains a squirrel and two lights, and nothing else: no trees, no path, and no floor for the model to stand on. The forest behind it is a video, played with react-native-video, a powerful Nitro-based video player library for React Native, in a view sitting underneath the Filament one. Filament's view has no skybox, so it is transparent everywhere the model isn't and the forest shows straight through.
A video rather than a still image, because a still forest behind a breathing character looks like a photo backdrop, while leaves moving in the wind gives the right vibe. The cost is that it has to loop, and ours didn't: the last frame and the first frame were visibly different, so every four seconds the forest jumped.
We fixed that in the asset rather than in the app, with ffmpeg, by crossfading the tail of the clip onto its head so that the end blends into the beginning. The result is a file that genuinely loops, which means the app needs to do nothing clever at all:
import {VideoView, useVideoPlayer} from 'react-native-video';

// v7 API, in beta at the time of writing
export function ForestVideoBackground() {
  const player = useVideoPlayer(SRC, player => {
    player.muted = true;
    player.loop = true;
  });

  return (
    <VideoView
      player={player}
      resizeMode="cover"
      style={styles.video}
      // A SurfaceView can't be transformed on Android, and this one sways with the gyro.
      surfaceType="texture"
    />
  );
}
Which then goes into the scene beneath everything else, so the squirrel and its forest are two flat layers stacked in the right order:
<View style={styles.container}>
  <ForestVideoBackground />
  <SquirrelModel model={model} animator={animator} />
</View>
The shadow the model doesn't really cast
One of the cheapest things that make a character feel like it's standing somewhere, rather than floating in front of it, is a shadow at its feet. Ours has one, but it's kinda fake.
We do have a light that casts them:
<Light type="directional" intensity={20_000} colorKelvin={5_200} castShadows={true} />
The trouble is that a cast shadow needs a surface to land on, and our scene doesn't contain one. There's no ground plane in the .glb, because the ground is the forest video playing behind the Filament view. Filament can't drop a shadow onto pixels it doesn't own, so castShadows buys us self-shadowing on the body and nothing at all underneath it.
So we fake it, with a soft dark ellipse as a PNG:
<Animated.View style={styles.wrap} pointerEvents="none">
  <NitroImage image={SHADOW} style={styles.img} resizeMode="contain" />
</Animated.View>
Note where this lives: it's a regular image, rendered using react-native-nitro-image, not part of the 3D scene, sitting in the tree just before <SquirrelModel /> so it's drawn underneath the model. A flattened ellipse at 90% opacity is enough to read as contact.
It also has to stay glued to its feet, and it moves: the whole scene lifts and shrinks when the keyboard opens. That comes for free by putting the shadow inside the same animated wrapper as the model, so a single transform moves both.
Giving the model a voice
Amy renders, idles and waves. The next step is talking, and the obvious way to do that is the way we've all probably built it before: send the user's message to an LLM, wait for the text, hand that text to a text-to-speech engine, play the result.
That pipeline has a problem that can be felt. The smallest thing a TTS engine can speak convincingly is a whole sentence, so the first sound can't happen until the model has finished sentence one and the synthesiser has turned it into audio. Two waits, back to back, every time. We measured that path on a real phone later in this project, and the first word arrived in 6.1 seconds.
So we skip it. gpt-realtime emits audio itself, as tokens, over a WebSocket. There's no synthesis step behind the model because the model is the synthesiser, and the smallest unit it can send is a fraction of a syllable rather than a sentence.
The transport is a WebSocket, and we use react-native-nitro-websockets rather than React Native's built-in one, mostly for something the built-in has no answer to: it can open the connection natively at app start, before the JS bundle runs. On a Galaxy S22 that took the handshake from a median of 1,249ms down to 620ms across 32 launches, roughly half, which is time the first reply doesn't spend waiting on a socket.
Audio then arrives as a continuous stream of base64 chunks for as long as Amy is speaking, and every one of those crosses from native into JS.
Opening the connection is the ordinary part:
import {NitroWebSocket} from 'react-native-nitro-websockets';

const ws = new NitroWebSocket(REALTIME_URL, undefined, {
  Authorization: `Bearer ${OPENAI_API_KEY}`,
});
The interesting part is the first thing we say once it's open. A realtime session starts out generic, and we have to tell it who it's being: what voice to use, what format we want the audio in, how to behave, and which tools it's allowed to call.
ws.onopen = () => {
  ws.send(
    JSON.stringify({
      type: 'session.update',
      session: {
        type: 'realtime',
        output_modalities: ['audio'],
        audio: {
          output: {
            voice: 'marin',
            format: {type: 'audio/pcm', rate: 24000},
          },
        },
        instructions: buildInstructions(new Date()),
        tools: [ADD_CALENDAR_EVENT_TOOL],
      },
    }),
  );
};
A couple of these deserve a note. output_modalities: ['audio'] means we don't ask for a text response at all: we still get a transcript of what Amy says, but as a side-channel to the audio rather than as the thing being generated. And instructions is where Amy's personality lives, built fresh with the current date so the model knows what "tomorrow at 9" means; we'll come back to that when it starts writing to the calendar.
Turning chunks into a voice
With the session configured, a turn is a matter of listening to the events that come back. The two we care about arrive interleaved, dozens of times per reply:
case 'response.output_audio.delta':
  activeTurn?.onAudioDelta(event.delta);       // base64 PCM16 @ 24kHz
  break;
case 'response.output_audio_transcript.delta':
  activeTurn.transcript += event.delta;        // the words, for captions
  activeTurn.onTranscriptDelta(event.delta);
  break;
Playing them falls to react-native-audio-api, which gives us the Web Audio API but for native apps. We create a context, and one number in there matters a lot:
const audioContext = new AudioContext({sampleRate: 24000});
That 24000 has to match the rate we asked the model for. Get it wrong and the audio still plays perfectly happily, just at the wrong speed, making the voice sound too high-pitched.
Furthermore, chunks then go into a buffer queue, which plays them back to back as a continuous stream rather than as separate sounds:
const queue = audioContext.createBufferQueueSource({pitchCorrection: false});
There's one trap in filling that queue. Decoding is native and asynchronous, so if you fire off a decode per chunk as it arrives, they can finish out of order, and audio queued out of order is audible immediately as scrambled speech. We keep a promise chain to force arrival order:
enqueue(base64Pcm: string) {
  decodeChain = decodeChain
    .then(async () => {
      const buffer = await audioContext.decodePCMInBase64(base64Pcm, sampleRate, 1);
      queue.enqueueBuffer(buffer);
      if (!started) {
        started = true;
        queue.start(0, 0);
      }
    })
    // A chunk that fails to decode drops out; the ones behind it still play.
    .catch(error => console.warn('[voice] pcm chunk failed', error));
}
Note that playback only starts once, on the first chunk. Everything after that is appended to a queue that's already running, which is what makes the reply start speaking while the rest of it is still being generated.
The last piece is knowing when Amy has actually stopped. The model finishing its turn and the speaker going quiet are different moments, sometimes seconds apart, since there's still queued audio to get through. We count buffers in and out, and only settle when the model is done and the queue has drained:
queue.onBufferEnded = () => {
  pending -= 1;
  settle();
};
That's what lets the app switch Amy's status back to idle at the right moment, rather than while it is still mid-sentence.
Animating the model's mouth
A voice coming out of a still face reads very weirdly, so the model's mouth has to move with the audio.
Proper lip sync means recognising phonemes and mapping them to mouth shapes, and doing that live, on a phone, while a 3D scene renders. We do something much cheaper: we listen to how loud the audio is, and open the jaw by that much. It is not lip sync in any real sense, and it reads as convincing enough anyway.
The loudness has to come from somewhere, and the neatest place to get it is inside the audio graph itself. react-native-audio-api lets us insert a worklet node into the chain, which receives the raw samples as they pass through on their way to the speaker:
const measureLevel = (audioData: Float32Array[]) => {
  'worklet';
  const channel = audioData[0];
  let sumOfSquares = 0;
  for (let i = 0; i < channel.length; i++) {
    sumOfSquares += channel[i] * channel[i];
  }
  const rms = Math.sqrt(sumOfSquares / channel.length);
  speechLevel.value = Math.min(1, rms * MOUTH_SENSITIVITY);
};

const levelNode = audioContext.createWorkletNode(
  measureLevel,
  1024,          // samples per reading
  1,             // channels
  'UIRuntime',
);

// The voice reaches the speaker through the node, so it sees every sample.
queue.connect(levelNode);
levelNode.connect(audioContext.destination);
That's the root-mean-square of a 1024-sample window, which is a decent proxy for perceived loudness, normalised to 0..1 and written straight into a shared value.
Look at where it runs, though: 'UIRuntime'. The measurement happens on the same runtime as our render callback, so the number never visits the JS thread at all. Audio samples come in on the audio thread, the level lands in a shared value, and Filament's render loop reads it on the next frame.
Which means the mouth is one line away:
transformManager.setEntityRotation(mouthEntity, mouthLevel * MOUTH_GAIN, [1, 0, 0], true);
mouthEntity is the model's jaw bone, found once by name when the asset loads:
const mouthEntity = useMemo(() => asset.getFirstEntityByName('Mouth'), [asset]);
Rotating a bone we happen to know is called Mouth is, admittedly, not a general solution. It's specific to this model, so if you swap in another character, you'll need to open its .glb and find out what its jaw is called.
Feeding the raw level to the bone directly gets you most of the way there and looks wrong in two specific ways, both worth fixing.
The first is chatter. Audio has a noise floor, and small fluctuations around it make the jaw twitch constantly while Amy isn't really saying anything. So we gate: anything below a threshold counts as silence, and the rest is rescaled so speech still reaches a fully open mouth.
const target = rawLevel < MOUTH_GATE ? 0 : (rawLevel - MOUTH_GATE) / (1 - MOUTH_GATE);
The second is that real jaws don't move like amplitude. They snap open and fall closed more slowly, so we smooth towards the target with two different rates depending on which way we're going:
mouthState.value +=
  (target - mouthState.value) *
  (target > mouthState.value ? MOUTH_ATTACK : MOUTH_RELEASE);
MOUTH_ATTACK is 0.45 and MOUTH_RELEASE is 0.22, so the mouth opens roughly twice as fast as it closes. It's a small asymmetry that makes a surprising difference: with equal rates the mouth looks like it's being pulled by a spring, and with the asymmetry it looks like speech.
Two smaller things ride along on the same signal. The ears rotate with the jaw at a third of the angle, which reads as the whole head being animated rather than just a mouth flapping. And a set of bones around the cheeks and eyebrows shift into a smile whenever Amy is speaking, driven not by loudness but by a plain "is Amy talking" flag with its own smoothing, so the expression fades in and out rather than snapping.
None of these are things the model's artist authored. They're four bones and a bit of arithmetic, layered on top of the idle clip that's still playing underneath.
Making the model do things
Talking is half of it. The other half is that when a user says "book me in for Saturday at eleven", something should actually appear in their calendar. That's the tool call we declared back in session.update:
const ADD_CALENDAR_EVENT_TOOL = {
  type: 'function',
  name: 'add_calendar_event',
  description: "Add an event to the user's device calendar.",
  parameters: {
    type: 'object',
    properties: {
      title: {type: 'string', description: 'Short event title'},
      start_time: {
        type: 'string',
        description: 'Start datetime in ISO 8601, local time with the UTC offset',
      },
      end_time: {type: 'string', description: 'Optional end datetime in ISO 8601'},
      notes: {type: 'string', description: 'Optional notes'},
    },
    required: ['title', 'start_time'],
  },
};
The model can't call this itself, of course. It asks, we do the work, and we hand the answer back. When a turn produces a function call, we run it and post the result into the conversation, then ask for another response so Amy can say something about what just happened:
const output = await turn.onToolCall(pending.name, pending.args);

socket.send(JSON.stringify({
  type: 'conversation.item.create',
  item: {type: 'function_call_output', call_id: pending.callId, output},
}));
socket.send(JSON.stringify({type: 'response.create'}));
That second message matters. Without it the model has our answer and no reason to speak, so it would write to your calendar in complete silence.
Our side of the call is react-native-nitro-event-kit, which talks to EventKit on iOS:
const startMs = Date.parse(args.start_time);
const event = await addCalendarEvent({
  title: args.title,
  startMs,
  endMs: Number.isNaN(endMs) ? undefined : endMs,
  notes: args.notes,
});
Teaching the model what "tomorrow" means
Here's the thing that's easy to miss. A model has no idea what time it is. Ask it to schedule something for "tomorrow at 9" and it will confidently produce a date, and that date will be wrong, because it's guessing from whenever its training data thought "now" was.
So we tell it, in the instructions, every time we open a session:
`Local time now: ${now.toString()} (UTC offset ${tzOffset(now)}). `
And then we're specific about the format we want back, because this is the other place it goes wrong:
'call add_calendar_event with a title and ISO 8601 start_time (and end_time if given) ' +
`in LOCAL time with that offset, e.g. ${exampleLocalIso(now)}, never UTC, never a trailing "Z". `
The trailing Z is worth the emphasis. Models love to hand you 2026-08-18T09:00:00Z, which is a perfectly valid timestamp meaning 9am UTC, which for a visitor in Lagos is 10am and for one in Los Angeles is 2am the previous day. The event lands in the calendar, at the wrong time, and nothing anywhere reports an error. Giving it an example of the exact shape we want, generated from the user's actual clock, keeps it accurate.
All of that assumes Amy is on screen and ready, which is not the case for the first few hundred milliseconds, and what happens in that gap is its own problem.
Starting up fast without showing the seams
Loading a 3D scene takes some time. On a Galaxy S22 our app is interactive about 400ms after launch, and most of that isn't JavaScript: the bundle runs in around 65ms, and the rest is Filament parsing the model, uploading it to the GPU and drawing the first frame.
400ms is generally fine. What isn't fine is what the user sees during it, because the app is perfectly capable of showing you an empty forest with no squirrel in it, and that looks broken rather than loading.
The first thing worth doing is making the model itself smaller. Ours arrived with twenty animation clips and we use two, so the other eighteen were parsed on every cold start for nothing. gltf-transform will drop the ones you don't need, which took 500KB off ours. Be careful with what you cut, though: our clips are referenced by index, so removing some renumbers the rest, and the app cheerfully plays the wrong animation rather than erroring.
Hiding the splash on the right frame
The bigger question is when to take the splash screen away. The usual answer is an effect, or an onLayout, and both are wrong in the same way: layout happens before anything is painted, so you dismiss the splash and hand over to a screen that hasn't drawn yet.
Both also run on the JS thread, so the dismissal queues behind whatever else JS is busy with during startup, which is the worst possible moment to be waiting in line.
So we use a patched version of react-native-bootsplash that dismisses natively, when a view has actually been drawn. The patch adds an invisible Fabric view whose only job is to notice its own onDraw and hide the splash from the native side, with no round trip through JS:
<BootSplash.HideOnDraw fade />
For anyone interested, here's a PR to react-native-bootsplash with our patch as its content.
Then the last piece is a nice trick: because it's a React component, when we mount it decides when the splash can go. We only render it once the model has finished loading:
{model.state === 'loaded' && <BootSplash.HideOnDraw fade />}
So the splash stays up for the whole load, and the frame it disappears on is the frame that has a squirrel in it. Nothing in between is ever visible.
Why the model isn't running on-device
There's an obvious objection to everything above: why is a talking squirrel making a network call at all? Phones run models now. Keeping the brain on the device would make it private, free to run, and available in a zoo with no signal.
We built that version first, and then we measured it, because it seemed like the sort of thing you should be able to check rather than argue about.
The benchmark ran inside the real app, driving the same pipeline production uses, with the 3D scene rendering the whole time. Fifteen prompts with known-correct answers, across six categories: animal questions with a fact available, animal questions without one, scheduling requests with explicit times, scheduling with relative times ("tomorrow at 9"), chit-chat, and a category of distractors, which are prompts that sound like scheduling but aren't. "Remind me why squirrels bury their nuts" should produce a fun fact, not a calendar entry.
Five on-device models went through it, from 224MB to 4.7GB. Four were benchmarked on a physical iPhone 16; the fifth was too large to fit on the phone, so it was evaluated separately on the simulator and left out of the device comparisons. The headline is time to first speech:
Ten times slower, and that's the best local result. The rest of the picture doesn't improve:
| Best on-device | Cloud | |
|---|---|---|
| Time to first speech | 6,130 ms | 574 ms |
| CPU during a turn | 238% | 37% |
| Calendar times correct | 0 / 5 | 4 / 5 |
| Phantom calendar events | 2 | 0 |
| Added app size | +1.0 GB | +0 |
| Works offline | Yes | No |
The instinct at this point is to reach for a different model, and we did. It doesn't work in either direction. The smaller ones are fast but never produced a valid tool call at all, so Amy will happily discuss your zoo trip and never write it down. Above that they're too slow, and in our tests they also got worse: moving from qwen3-1.7b to a 2B model dropped tool recall from 5/5 to 1/5 and pushed peak memory to 2.2GB. Asked to put a zoo visit in the calendar for Monday at 9:30, it replied "Oh, you're a squirrel? That's so fun!"
The 238% CPU figure is the one that matters most for this particular app. It is a live 3D scene with a mouth that has to keep moving. A model that saturates two cores for six seconds just before giving an answer is quite an unpleasant user experience.
But the deepest problem isn't the model at all, it's the shape of the pipeline. On-device, the path is: LLM writes a sentence → TTS synthesises that sentence → audio plays. The smallest thing that path can speak is a complete sentence, so the first sound waits for two things in series. gpt-realtime emits audio directly, and its smallest unit is a handful of audio tokens. A faster local model shortens the first wait; it doesn't remove the synthesis step sitting behind it.
One methodology note, in case you run this comparison yourself: don't benchmark on the simulator. The one model we ran in both places reported 3,858ms there against 6,130ms on the phone, so real hardware was 59% slower than the simulator suggested.
Extras
I'm sure by this point you would've noticed some parts of the demo UI that are platform native. That is, a liquid-glass composer, buttons and the like, and this section is dedicated to shining a light on them, along with a couple of smaller touches that didn't fit anywhere else.
Glass buttons
The two buttons in the top corners are LiquidGlassView from Callstack, which wraps UIKit's real glass material rather than approximating it with a blur. The catch is that liquid glass only exists on iOS 26 and above, so on anything older, and on Android, that view has nothing to render.
The library tells you whether you're on a device that has it, so the fallback is a plain dark circle:
{isLiquidGlassSupported ? (
  <LiquidGlassView style={styles.button} interactive effect="regular" colorScheme="dark">
    {icon}
  </LiquidGlassView>
) : (
  <View style={[styles.button, styles.fallback]}>{icon}</View>
)}
The icons have the same problem in a different flavour. We use SF Symbols, which are exclusively Apple's, so every symbol needs an Android counterpart. react-native-nitro-symbols has a fallback prop for exactly this, and we pass a Material Design icon into it:
<SymbolView
  symbolName="text.bubble"
  fallback={<MaterialDesignIcons name="message-text-outline" size={20} color="#fff" />}
/>
Getting out of the way of the keyboard
The model stands in the middle of the screen and the text input sits at the bottom, so when the keyboard opens it would be hidden behind it. It needs to move, and it needs to move with the keyboard rather than after it.
react-native-keyboard-controller gives us the keyboard's position as an animated value, updated frame by frame as it slides:
const {height: keyboardHeight, progress: keyboardProgress} =
  useReanimatedKeyboardAnimation();
The model then lifts and shrinks slightly as the keyboard comes up, both driven off that same value so the whole thing is one continuous movement:
const avatarStyle = useAnimatedStyle(() => ({
  transform: [
    {translateX: sway.value},
    {translateY: keyboardHeight.value * AVATAR_LIFT_FRACTION},
    {scale: 1 - AVATAR_SHRINK * keyboardProgress.value},
  ],
}));
The model rises by a fraction of the keyboard's height rather than all of it, since matching it exactly would send it off the top of the screen. The slight shrink is what makes it read as stepping back to make room, rather than being shoved upwards.
Note translateX: sway.value sitting in there as well: the tilt from earlier and the keyboard lift compose into a single transform, so both can happen at once without fighting each other.
The transcript
Everything Amy says is also written down, in a sheet you open from the button in the corner. It's a TrueSheet, which is a real native bottom sheet rather than a generic view-based one, with a LegendList inside it for the messages.
The sheet is loaded lazily, since it isn't needed until someone taps the button:
const TranscriptSheet = React.lazy(() =>
  import('./TranscriptSheet').then(m => ({default: m.TranscriptSheet})),
);
Wrapping up
We set out to build a Talking Tom-inspired 3D AI assistant, and the interesting part turned out not to be the AI at all. Wiring up gpt-realtime is a WebSocket and a JSON payload. What took the thought was everything around it: keeping a 3D scene at 60fps while audio streams in, getting a mouth to move convincingly from nothing but loudness, and making sure a model that has no idea what day it is can still put the right thing in your calendar.
The thing I'm most excited about here is the performance, which is a key factor for a 3D experience like this one to be enjoyable. The app runs buttery smooth at 60fps on both iOS (iPhone 16) and Android (Galaxy S22), with no visible lag or stutter.
Additionally, the source code for AvatarAssist is open source, so take it apart and build your own talking animal. 🐿️
Huge thanks to all the maintainers who built the awesome OSS libraries we used for this demo. Listed below are those libraries and their maintainers.
- react-native-filament - Hanno Gödecke and Marc Rousavy / Margelo
- Filament - Google
- react-native-worklets-core - Marc Rousavy / Margelo
- react-native-video - The Widlarz Group
- react-native-audio-api - Software Mansion
- react-native-reanimated - Software Mansion
- react-native-keyboard-controller - Kiryl Ziusko / Margelo
- react-native-true-sheet - Jovanni Lo
- Legend List - Jay Meistrich / Margelo
@callstack/liquid-glass- Oskar Kwaśniewski and Callstack- react-native-bootsplash - Mathieu Acthernoene
- Nitro - Marc Rousavy / Margelo
- react-native-nitro-websockets - Szymon Kapała / Margelo
- react-native-nitro-image - Marc Rousavy / Margelo
- react-native-nitro-event-kit - Vladyslav Martynov
- react-native-nitro-symbols - Dave Mkpa-Eke / Margelo
- "Cute Character with Animations" - Ivana Boskovic, CC-BY-4.0