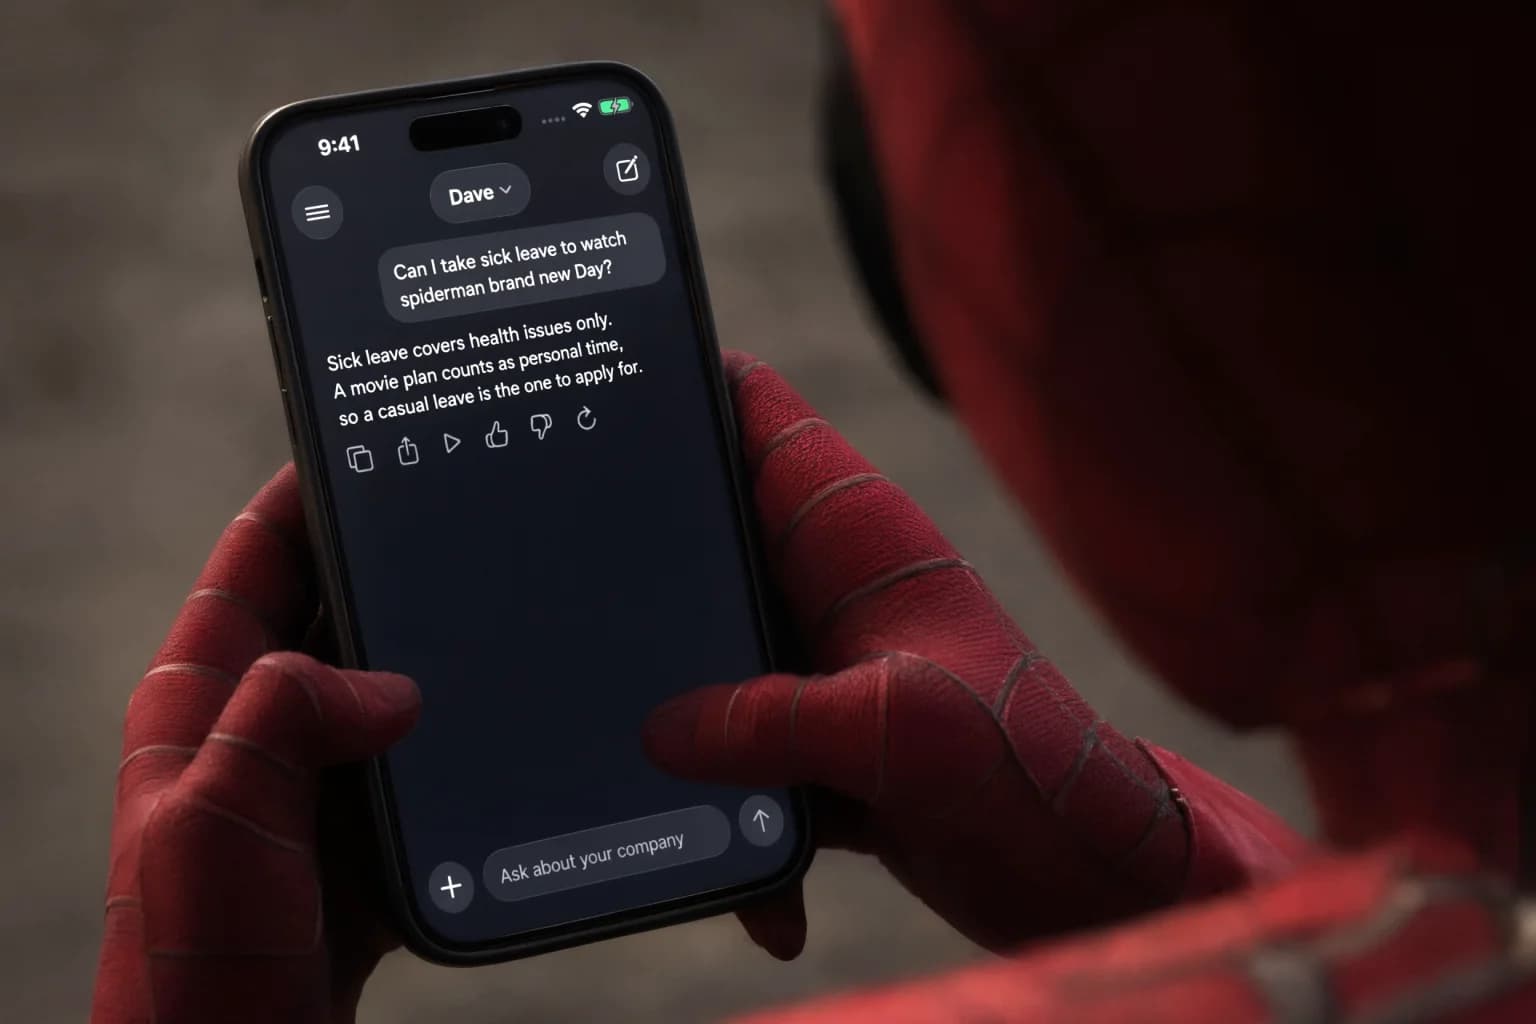
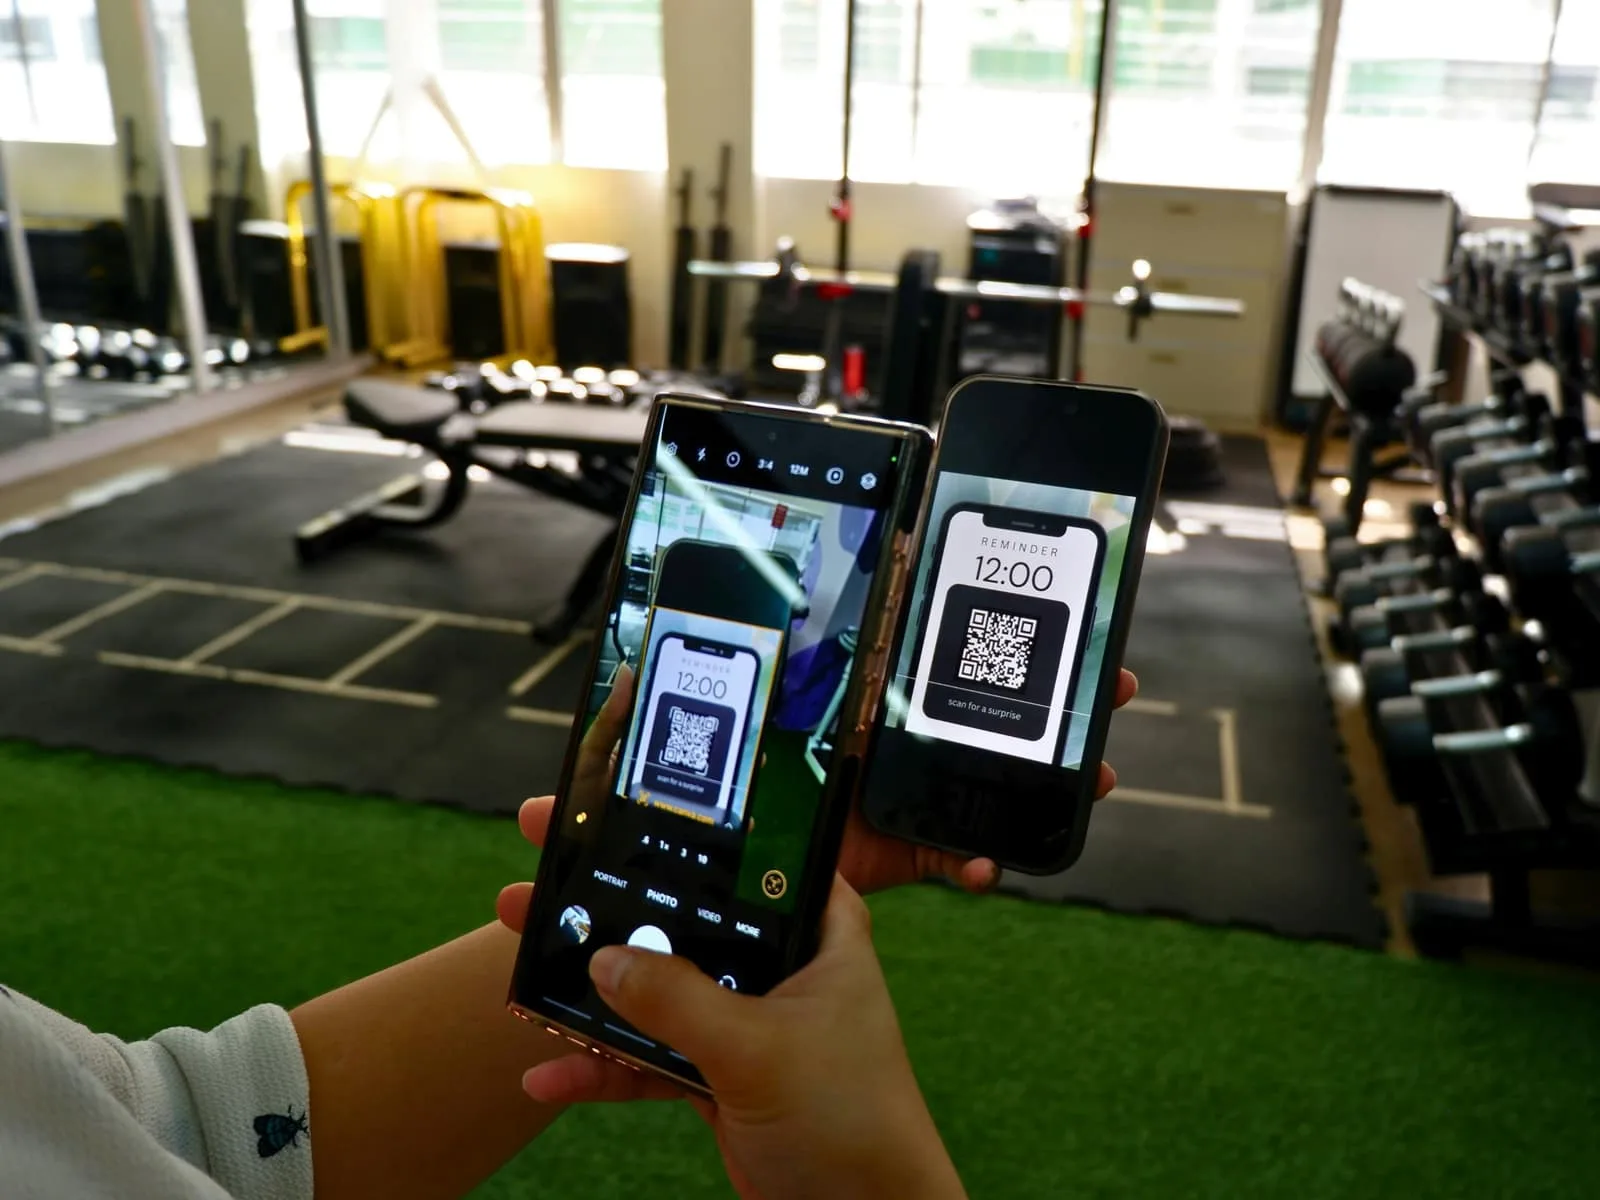
Scanning Barcodes in React Native Apps: The Complete Guide (2026)
Every major way to scan QR codes and barcodes - from free to paid solutions - in React Native in 2026, compared by the creator of VisionCamera.
Marc Rousavy
Creator of VisionCamera & Nitro Modules
If you need a React Native barcode scanner in 2026, the code is the easy part. The hard part is choosing the right library for your needs to avoid leveraging a full - possibly paid - ML pipeline for something that could be a simple method call to a platform-native API.
I created react-native-vision-camera and react-native-data-scanner, so I've spent years inside this problem: scanning QR codes, EAN-13s, PDF417s, and everything in between, on virtually every kind of device.
I hope for this to be the go-to guide for anything QR/barcode scanning related in React Native. We'll cover the easiest way to scan a QR code (one method call, no camera UI to build), the most powerful way (an in-app camera view), the Expo way, scanning codes from images, which barcode formats each library supports, and when a commercial SDK is worth paying for (and when it isn't).
Alright, let's get into the good stuff!
Which barcode scanner should you use?
The best barcode scanner library for React Native depends on what you're building. Here's the whole decision in one table:
| Your use case | Use this |
|---|---|
| Scan one QR code or barcode and get its value - no custom UI needed | react-native-data-scanner |
| In-app camera view - custom overlays, multiple codes, validate before accepting | react-native-vision-camera + barcode scanner plugin |
| iOS-only app with the smallest possible footprint | VisionCamera's Object Output (zero extra dependencies) |
| Expo-first setup (e.g. Expo Go) | expo-camera |
| Damaged or extremely dense codes at industrial scale | A commercial SDK - see the breakdown below |
If you just want the fastest path to scan a QR code: install react-native-data-scanner, call scanBarcode(), and you're done. The rest of this guide explains why, and what to do when your requirements grow.
The four engines underneath (ML Kit, AVFoundation, VisionKit, ZXing)
Every React Native barcode scanning library is a wrapper around one of four native engines. Knowing which one you're actually running explains almost every difference in behavior:
| Engine | iOS | Android | Used by |
|---|---|---|---|
| Google ML Kit | ✅ | ✅ | VisionCamera's Barcode Scanner (both platforms), expo-camera (Android), react-native-data-scanner (Android, via Google's code scanner) |
AVFoundation AVCaptureMetadataOutput | ✅ | ❌ | VisionCamera's Object Output, expo-camera (iOS, most formats) |
VisionKit DataScannerViewController | ✅ | ❌ | react-native-data-scanner (iOS 16+), expo-camera's launchScanner() (iOS 16+; Android uses Google's code scanner) |
| ZXing | ✅ | ✅ | expo-camera bundles it on iOS to decode PDF417, Code 39, and Codabar instead of using AVFoundation |
This matters because decoder quirks belong to the engine, not the wrapper. If ML Kit struggles with an inverted barcode, every ML Kit-based library struggles with it. If iOS reports a UPC-A as EAN-13, every library built on Apple's APIs does (more on that below).
With the engine map in place, let's go through the wrappers, simplest first.
The easiest way: scan a barcode with one method call
For most apps, "barcode scanning" means: open a scanner, the user scans one code, you get the value back. A payment app scanning an invoice QR, or a fitness app looking up a product by its EAN.
For exactly this flow I built react-native-data-scanner. It has one method:
import { DataScanner } from 'react-native-data-scanner'

async function scanBarcode() {
  const barcode = await DataScanner.scanBarcode({
    targetFormats: ['qr', 'ean-13'],
    enableAutoZoom: true, // Android-only: auto-zoom onto distant codes
  })

  console.log(barcode.format, barcode.value)
}
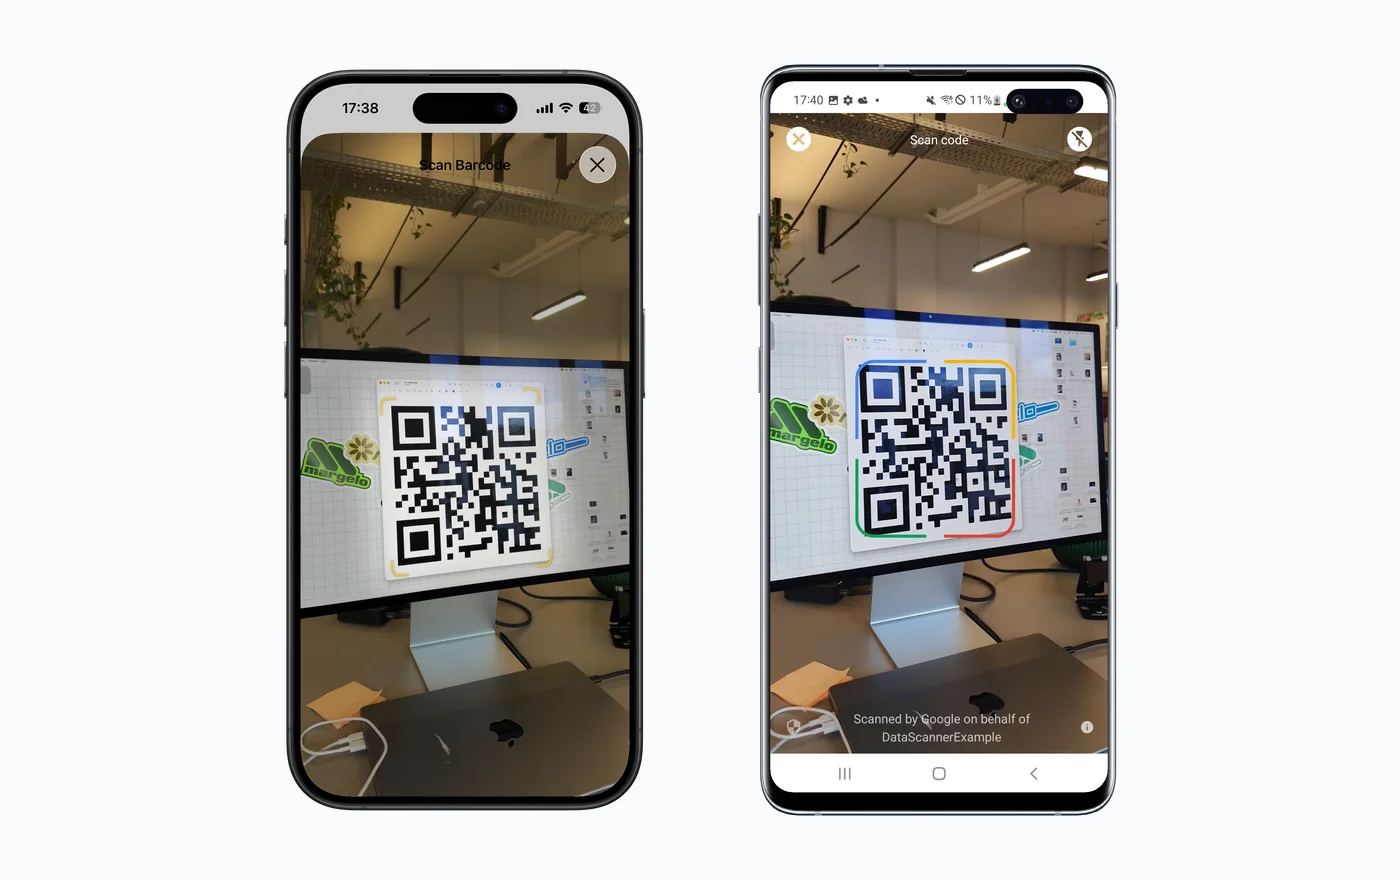
That's it - it just works. Calling scanBarcode(...) presents the platform-native scanner UI (VisionKit's DataScannerViewController on iOS, Google's code scanner on Android), and the Promise resolves with the scanned barcode, or rejects if the user cancels:
try {
  const barcode = await DataScanner.scanBarcode({ targetFormats: ['qr'] })
  handleScannedCode(barcode.value)
} catch (error) {
  // rejects with distinct messages for: user canceled, a missing
  // NSCameraUsageDescription (iOS), or scanning unavailable on this
  // device (on iOS that includes denied camera permission)
}
There's no camera view to lay out and no permission hook to wire up. No callback firing 30 times per second to debounce, either. The OS handles the viewfinder, the guidance, the highlighting, and the zoom:
Install the package with its Nitro Modules dependency, then rebuild your native app (npx pod-install plus a rebuild on bare React Native, npx expo run:ios / npx expo run:android on Expo):
npm install react-native-data-scanner react-native-nitro-modules
No camera permission needed on Android
This is my favorite detail: on Android, Google's code scanner runs in a separate Google Play services activity, outside your app. That means your app does not need android.permission.CAMERA at all. No permission dialog, no permission denial flow, and one less scary entry in your Play Store listing.
On iOS you still need an NSCameraUsageDescription in your Info.plist (the library checks for it and rejects with a clear error if it's missing):
<key>NSCameraUsageDescription</key>
<string>$(PRODUCT_NAME) uses the camera to scan barcodes.</string>
In Expo projects, set it via app.json → expo.ios.infoPlist instead.
Requirements and trade-offs
I designed react-native-data-scanner to be the simplest option, not the most flexible one. Be aware of what you're trading:
- The UI is the OS's, not yours. The scanner opens as a new view controller (iOS) or activity (Android) on top of your app. You can't draw your own overlay, reticle, or instructions.
- One code per scan. The Promise resolves with a single barcode. You can't keep scanning continuously or detect multiple codes in one frame.
- No pre-validation. You can't inspect a code in JS and decide to keep scanning: say, only accepting URLs, or verifying a payment address against your backend before closing the scanner. The scanner closes on the first hit.
- iOS 16+ at runtime. On older iOS versions, the Promise rejects (your app still builds and runs fine).
- Google Play services required on Android. Devices without Play services (some Huawei models, AOSP builds) can't use Google's code scanner. The first scan may also trigger a one-time module download.
- No Expo Go. Needs a development build, like every library with native code (see the Expo section below).
If any of those is a dealbreaker, you've probably outgrown one-shot scanning. Here's how the two compare:
| Feature | VisionCamera | react-native-data-scanner |
|---|---|---|
| Zero-config one-shot scan | ❌ | ✅ |
| Platform-native scanner UI | ❌ | ✅ |
| Works without camera permission (Android) | ❌ | ✅ |
| Render your own in-app camera UI | ✅ | ❌ |
| Scan multiple codes continuously | ✅ | ❌ |
| Validate codes in JS before closing the camera | ✅ | ❌ |
| Custom overlays, reticles, masks | ✅ | ❌ |
| Scan codes in still images (gallery) | ✅ | ❌ |
| Photos, video, zoom, focus, HDR, frame processing | ✅ | ❌ |
For more info, see VisionCamera vs Data Scanner in the VisionCamera docs.
A rule of thumb for payment apps: if you must verify the code before the camera closes, choose VisionCamera. With react-native-data-scanner, the camera closes first, then you can validate the code.
The most powerful way: an in-app camera with VisionCamera
When scanning is part of your camera experience (a custom viewfinder, a scan-and-confirm flow, multiple codes at once, or scanning plus photo capture in one session), you want an in-app camera view. That's VisionCamera, the most powerful camera library in React Native, recently rebuilt as V5.
VisionCamera is the camera, not the decoder
A useful way to think about VisionCamera is that it owns the camera experience: the stable in-app session, preview, lenses, focus, zoom, FPS, photo and video capture, outputs, and coordinate conversions. The barcode decoder is one replaceable part of that pipeline.
ML Kit and Apple's Object Output are the ready-made integrations covered below, but they are not the only engines you can use. Any native decoder that accepts camera frames - ZXing, an in-house C++ engine, or a commercial SDK that exposes a frame API - can run behind an existing or custom Native Frame Processor Plugin. If an engine needs to participate directly in the camera session, it can instead be implemented as a custom native CameraOutput.
Both extension points use Nitro Modules. In practice, you define a typed TypeScript API, implement it in Swift, Kotlin, or C++, and return the scan results while the full camera frames stay in native memory. The adapter can live in your app, in an open-source plugin, or inside the commercial SDK itself.
Changing the engine does not mean rebuilding the camera screen. You keep the same camera session, UI, controls, capture pipeline, and coordinate system. Results can drive normal React overlays, or frame-synchronous boxes and masks rendered on the GPU with Skia Frame Processors.
Install the packages used in the examples below. The second command adds the ready-made ML Kit integration used in the first example:
npm i react-native-vision-camera react-native-nitro-modules react-native-nitro-image
npm i react-native-vision-camera-barcode-scanner
Unlike react-native-data-scanner, VisionCamera renders the camera inside your app, so it needs camera permission on both platforms. Request it with the useCameraPermission() hook; my VisionCamera V5 scanning guide walks through the full setup.
The next two sections cover the ready-made integrations that fit most apps. Let's start with the cross-platform option.
Cross-platform: the ML Kit Barcode Scanner
The react-native-vision-camera-barcode-scanner package runs ML Kit on both iOS and Android, so detection behaves identically across platforms: same formats, same accuracy, same result shape. The simplest entry point is the drop-in <CodeScanner /> view:
import { StyleSheet } from 'react-native'
import { useIsFocused } from '@react-navigation/native'
import { CodeScanner } from 'react-native-vision-camera-barcode-scanner'

function ScannerScreen() {
  // from react-navigation, or pass isActive={true} if the screen is always visible
  const isFocused = useIsFocused()

  return (
    <CodeScanner
      style={StyleSheet.absoluteFill}
      isActive={isFocused}
      barcodeFormats={['qr-code', 'ean-13']}
      onBarcodeScanned={(barcodes) => {
        console.log(`Scanned ${barcodes.length} codes!`)
      }}
      onError={(error) => {
        console.error('Scanning failed:', error)
      }}
    />
  )
}
From there you can scale up to attaching a barcode scanner output to a full <Camera /> alongside photo capture, or calling the scanner imperatively inside a frame processor with custom overlays and coordinate conversion. I wrote a dedicated deep dive covering all of it (installation, permissions, resolution tuning, overlays, and production gotchas): QR and Barcode Scanning in React Native with VisionCamera V5.
One practical note: the ML Kit pod needs an iOS 15.5+ deployment target and ships no Apple Silicon Simulator slice, so on a modern Mac it's effectively device-only. Develop on a real device, or use the Object Output below instead to keep Simulator builds working (the Simulator has no camera feed to scan with anyway).
iOS-only, zero dependencies: the Object Output
VisionCamera core (V5+) also ships the Object Output: a thin wrapper over AVFoundation's AVCaptureMetadataOutput, Apple's built-in detection pipeline. It adds no third-party dependencies and no ML model to your binary, and it can detect faces, bodies, and pets on top of barcodes:
import { StyleSheet } from 'react-native'
import { Camera, useObjectOutput, isScannedCode } from 'react-native-vision-camera'

function ScannerScreen() {
  const objectOutput = useObjectOutput({
    types: ['qr'],
    onObjectsScanned(objects) {
      for (const object of objects) {
        if (isScannedCode(object)) console.log(`Scanned: ${object.value}`)
      }
    },
  })

  return (
    <Camera
      style={StyleSheet.absoluteFill}
      device="back"
      isActive={true}
      outputs={[objectOutput]}
    />
  )
}
It's iOS only, though: Android has no equivalent native metadata output. The docs compare the two approaches in detail in Barcode Scanner vs Object Output. In short, ML Kit gives you cross-platform consistency and richer decoding (raw bytes, semantic value types like 'url' or 'wifi'), while the Object Output is lighter and more power-efficient, and supports a few formats ML Kit doesn't (Micro QR, Micro PDF417, GS1 DataBar).
Advanced: the leanest possible setup
You can combine both: use the Object Output on iOS and the ML Kit Barcode Scanner on Android, then exclude the barcode-scanner package from iOS autolinking so the ML Kit dependency never enters your iOS binary. React Native's standard react-native.config.js mechanism handles the exclusion:
module.exports = {
  dependencies: {
    'react-native-vision-camera-barcode-scanner': {
      platforms: {
        ios: null, // iOS uses the native Object Output instead
      },
    },
  },
}
That config is only half of the setup. It keeps ML Kit out of the iOS app, but it doesn't swap the scanner in your TypeScript code. For that, create two files with the same name and a platform suffix. React Native will pick the right one automatically.
On iOS, use the Object Output from VisionCamera core:
import { isScannedCode, useObjectOutput } from 'react-native-vision-camera'

export function useBarcodeOutput(onScanned: (value: string) => void) {
  return useObjectOutput({
    types: ['qr'],
    onObjectsScanned(objects) {
      for (const object of objects) {
        if (isScannedCode(object) && object.value != null) {
          onScanned(object.value)
        }
      }
    },
  })
}
On Android, use the ML Kit output:
import { useBarcodeScannerOutput } from 'react-native-vision-camera-barcode-scanner'

export function useBarcodeOutput(onScanned: (value: string) => void) {
  return useBarcodeScannerOutput({
    barcodeFormats: ['qr-code'],
    onBarcodeScanned(barcodes) {
      for (const barcode of barcodes) {
        if (barcode.rawValue != null) {
          onScanned(barcode.rawValue)
        }
      }
    },
  })
}
The rest of the camera screen stays shared. Import the hook without a suffix:
import { useCallback } from 'react'
import { StyleSheet } from 'react-native'
import { Camera } from 'react-native-vision-camera'
import { useBarcodeOutput } from './useBarcodeOutput'

export function ScannerScreen() {
  const handleScanned = useCallback((value: string) => {
    console.log(`Scanned: ${value}`)
  }, [])

  const barcodeOutput = useBarcodeOutput(handleScanned)

  return (
    <Camera
      style={StyleSheet.absoluteFill}
      device="back"
      isActive={true}
      outputs={[barcodeOutput]}
    />
  )
}
When Metro builds the iOS app, it loads useBarcodeOutput.ios.ts; on Android, it loads useBarcodeOutput.android.ts. The screen doesn't need an if (Platform.OS === ...), and the iOS bundle never imports the ML Kit scanner.
This is the most advanced configuration in this guide, but it produces an in-app scanner with zero scanning dependencies on iOS. Most apps should just use the ML Kit scanner on both platforms.
Scanning barcodes in Expo (expo-camera)
Both libraries above ship native code, so they need a development build and are out of reach inside Expo Go. If your project must stay in Expo Go, expo-camera is the right choice.
Install it with npx expo install expo-camera, then:
import { CameraView, useCameraPermissions } from 'expo-camera'
import { useState } from 'react'
import { Button, StyleSheet, Text, View } from 'react-native'

export default function Scanner() {
  const [permission, requestPermission] = useCameraPermissions()
  const [scanned, setScanned] = useState(false)

  if (!permission?.granted) {
    return (
      <View>
        <Text>We need camera permission to scan codes</Text>
        <Button onPress={requestPermission} title="Grant permission" />
      </View>
    )
  }

  return (
    <CameraView
      style={StyleSheet.absoluteFill}
      facing="back"
      barcodeScannerSettings={{ barcodeTypes: ['qr'] }}
      onBarcodeScanned={scanned ? undefined : ({ type, data }) => {
        setScanned(true)
        console.log(`Scanned ${type}: ${data}`)
      }}
    />
  )
}
Note the scanned ? undefined : ... pattern: onBarcodeScanned fires repeatedly while a code is in view, and swapping the prop to undefined after the first hit is the standard way to scan once.
Under the hood, expo-camera uses ML Kit on Android. On iOS it uses AVCaptureMetadataOutput for most formats, plus that bundled ZXing decoder for PDF417, Code 39, and Codabar, so expect small platform differences in behavior. Compared to VisionCamera, expo-camera simply does less: no frame processors (so no custom ML or per-frame control), no fps control or HDR, and only basic lens and resolution selection. For a scanner screen in an Expo Go project, none of that matters.
Expo also has a one-shot native-UI scanner of its own: launchScanner(), built on the same VisionKit (iOS 16+) and Google code scanner UIs that react-native-data-scanner uses, and it works in Expo Go. If you're locked into Expo Go and just need one scan, reach for that.
If you're already building with EAS or expo run, none of this constrains you: every option in this guide is available, so pick whichever fits your use case or preference.
Scanning a QR code from an image (gallery or file)
Scanning an existing photo, like a screenshot of a QR code or an image picked from the gallery, doesn't need a camera at all. react-native-data-scanner is camera-only, so it sits this one out. Two APIs do it.
In VisionCamera, the barcode scanner package scans still images via scanCodesInImageAsync(...). Load the image with react-native-nitro-image (already installed if you followed the VisionCamera setup above) from a file path like an image-picker result, a bundled resource, or a URL:
import { loadImage } from 'react-native-nitro-image'
import { createBarcodeScanner } from 'react-native-vision-camera-barcode-scanner'

async function scanImage(filePath: string) {
  const image = await loadImage({ filePath })
  const barcodeScanner = createBarcodeScanner({
    barcodeFormats: ['qr-code'],
  })

  try {
    const barcodes = await barcodeScanner.scanCodesInImageAsync(image)
    return barcodes.map((barcode) => barcode.rawValue)
  } finally {
    image.dispose()
    barcodeScanner.dispose()
  }
}
In Expo, the equivalent is a single call: Camera.scanFromURLAsync(url, barcodeTypes). The caveat is platform asymmetry: on iOS it only supports QR codes, while Android supports all formats. If you need to read EAN or PDF417 from images on iOS, use the VisionCamera API above.
Formats and platform quirks
Every library names formats slightly differently, and the platform engines disagree in a few places that will bite you in production. Both are covered here.
Supported barcode formats by library
Nobody documents this in one place, so I made the matrix myself. These are the exact string literals each API accepts:
| Format | react-native-data-scanner | VisionCamera Barcode Scanner (ML Kit) | VisionCamera Object Output (iOS) | expo-camera |
|---|---|---|---|---|
| QR Code | 'qr' | 'qr-code' | 'qr', 'micro-qr' | 'qr' |
| EAN-13 | 'ean-13' | 'ean-13' | 'ean-13' | 'ean13' |
| EAN-8 | 'ean-8' | 'ean-8' | 'ean-8' | 'ean8' |
| Code 128 | 'code-128' | 'code-128' | 'code-128' | 'code128' |
| Code 39 | 'code-39' | 'code-39' | 'code-39', 'code-39-mod-43' | 'code39' |
| Code 93 | 'code-93' | 'code-93' | 'code-93' | 'code93' |
| PDF417 | 'pdf-417' | 'pdf-417' | 'pdf-417', 'micro-pdf-417' | 'pdf417' |
| Data Matrix | 'data-matrix' | 'data-matrix' | 'data-matrix' | 'datamatrix' |
| Aztec | 'aztec' | 'aztec' | 'aztec' | 'aztec' |
| UPC-A | 'upc-a' * | 'upc-a' | reported as 'ean-13' * | 'upc_a' * |
| UPC-E | 'upc-e' | 'upc-e' | 'upc-e' | 'upc_e' |
| ITF | 'itf' | 'itf' | 'interleaved-2-of-5', 'itf-14' | 'itf14' |
| Codabar | 'codabar' | 'codabar' | 'codabar' | 'codabar' |
* On iOS, UPC-A codes are reported as EAN-13 (see below).
A few extras: the ML Kit scanner accepts 'all-formats' as a wildcard (or just omit targetFormats in react-native-data-scanner to scan everything), and the Object Output additionally detects GS1 DataBar variants, plus non-barcode objects like 'face' and 'human-body'.
Performance tip that applies to every library: only request the formats you actually need. A scanner looking for ['qr-code'] runs measurably faster than one decoding all thirteen formats on every frame.
PDF417 and driver's licenses
PDF417, the dense 2D format on boarding passes, shipping labels, and the back of US driver's licenses, deserves a caveat. Standard PDF417 scans fine with every option in this guide. ML Kit even parses driver's licenses semantically: the barcode scanner reports a valueType of 'driver-license'. (Note that expo-camera on iOS decodes PDF417 with its bundled ZXing decoder, not Apple's pipeline.)
But very dense, real-world PDF417s (small print, worn cards, bad lighting) can trip up free decoders. VisionCamera #3254 (since closed) documented ML Kit on Android failing to read receipt PDF417s that iOS decoded fine; decoder quality varies by engine and symbol density. Two practical tips: scan at the highest available resolution (in VisionCamera, set the barcode output's outputResolution to 'full'), and if your business depends on reliably scanning damaged licenses at scale, that's one of the few legitimate reasons to evaluate a commercial SDK.
Why UPC-A scans as EAN-13 on iOS
A UPC-A code is structurally an EAN-13 with a leading zero, and Apple's frameworks (AVFoundation and VisionKit alike) report it as EAN-13. This is iOS platform behavior that affects every scanner built on Apple's APIs: react-native-data-scanner, expo-camera on iOS, VisionCamera's Object Output, and every other camera library. It is not a bug in any of them.
Two ways to handle it:
- Normalize in JS: if you get an
'ean-13'value starting with0, strip the leading zero to get the UPC-A value. One exception: expo-camera already strips that zero natively (the type still saysean13), so don't strip it again there or you'll cut a real digit off UPC-A codes that start with 0. - Use the ML Kit Barcode Scanner, which runs the same decoder on both platforms; the
'upc-a'-vs-'ean-13'mismatch between iOS and Android goes away.
What to avoid, and when to pay for a scanner
Deprecated libraries: what to replace them with
The React Native camera ecosystem has turned over quite a bit, and many tutorials still recommend libraries that are no longer maintained. That's no knock on their authors - maintaining a camera library is brutal work - but you shouldn't start a new project on an archived dependency. The migration paths:
| Library | Status | Use instead |
|---|---|---|
| react-native-camera | Archived June 2023 | react-native-vision-camera |
| react-native-qrcode-scanner | Archived May 2023 (built on react-native-camera) | Any option in this guide (its own README points to VisionCamera) |
| expo-barcode-scanner | Deprecated in Expo SDK 50, removed in SDK 52 (Nov 2024) | expo-camera CameraView |
| vision-camera-code-scanner (community plugin) | Archived October 2023 (VisionCamera v2/v3 era) | react-native-vision-camera-barcode-scanner |
One more: @pushpendersingh/react-native-scanner is an actively maintained community scanner built on the New Architecture. I haven't used it myself, so I can't compare it in depth.
Do you need a commercial SDK? (Scandit, Scanbot)
If you've searched for React Native barcode scanning, you've seen the ads and the vendor blog posts: Scandit and Scanbot both publish guides and comparisons. Every one of them ends in a pitch for a paid SDK, and some of their claims about open-source libraries trace back to a single closed GitHub issue or a Reddit comment, or are simply outdated (see the engines table above).
The comparison, minus the sales pitch:
A commercial SDK makes sense for high-throughput industrial scanning: warehouse workers scanning hundreds of damaged, wrapped, or poorly printed codes per hour, long-range scanning, dense driver's-license PDF417 at scale, or multi-code AR overlays as a core product feature. The good commercial engines are better at the extreme edge cases, and you get a vendor SLA. If that's your business, run a trial and benchmark it on your codes.
Choosing a paid decoder does not necessarily mean replacing VisionCamera. If the vendor exposes a native API that accepts camera frames, its engine can sit behind a Native Frame Processor Plugin or custom CameraOutput. You keep VisionCamera's viewfinder, controls, capture pipeline, coordinate conversions, and overlays, and swap only the engine that processes each frame. If no integration exists yet, your team - or the SDK vendor - can expose one through a small Nitro Module.
Before signing anything, know that pricing is quote-only on both ("contact sales") and licenses are typically annual. Scanbot's SDK stops working after 60 seconds per session without a license key. The headline performance numbers are vendor-published: Scanbot's "scans in as little as 0.04 seconds", Scandit's 11-of-11 "tough codes" benchmark (in which ZXing scores 2 of 11). None of them come with a public methodology, a device list, or third-party verification. And the comparison articles pitting their SDKs against open source are written by the vendors' content teams. Treat them like any other vendor benchmark.
Free gets you further than the vendors admit. ML Kit is the same technology Google ships in its own apps, and AVFoundation is the camera framework underpinning iOS itself. For the realistic needs of most apps (a handful of formats, normal conditions, consumer phones) they're more than accurate enough, the wrappers are MIT-licensed, and there's no per-scan billing and no license server. Every library in this guide is free.
My take after years of building camera infrastructure: start with the free options. If they fail on your actual codes, you'll have hard numbers to hold a paid SDK against. A vendor's comparison table is not that.
Final thoughts
Barcode scanning in React Native is a solved problem in 2026. The only question left is how much control your app needs, and the table at the top of this guide answers it succinctly.
Start simple. You can always graduate from one-shot scanning to a full camera view later; I built the two libraries to work together.
FAQ
What is the best barcode scanner library for React Native?
For most apps: react-native-data-scanner. One method call, the OS draws the UI, and on Android you don't even need camera permission. (Disclosure: I built it; the trade-offs are listed above.) For an in-app camera view with custom UI, continuous scanning, or code validation, use react-native-vision-camera with its barcode scanner plugin. For Expo Go, use expo-camera.
How do I scan a QR code in React Native without camera permission?
On Android, use react-native-data-scanner: it delegates to Google's code scanner, which runs in a Google Play services activity outside your app, so your app needs no CAMERA permission. On iOS there's no equivalent: every scanning approach requires an NSCameraUsageDescription.
Does barcode scanning work in Expo Go?
Only with expo-camera's CameraView. Both react-native-vision-camera and react-native-data-scanner contain native code and require a development build (npx expo run:ios/run:android or EAS Build), which is a normal part of Expo development, just not the Expo Go sandbox.
How do I scan a QR code from an image in React Native?
Use scanCodesInImageAsync(...) from react-native-vision-camera-barcode-scanner with an image loaded via react-native-nitro-image: a gallery pick, a screenshot from disk, or a URL (snippet above). In Expo, Camera.scanFromURLAsync(...) works too, but only for QR codes on iOS.
Can React Native scan PDF417 barcodes like driver's licenses?
Yes: every library in this guide supports PDF417 ('pdf-417'/'pdf417'), and ML Kit even reports a 'driver-license' value type. Very dense or damaged real-world licenses are harder for free decoders; scan at full resolution, and consider a commercial engine only if you process them at scale.
Is react-native-qrcode-scanner deprecated?
Yes. It was archived in May 2023, its last release was in early 2022, and it depends on react-native-camera, which is also archived. Its own README recommends VisionCamera as the replacement.
Does react-native-vision-camera use VisionKit on iOS?
No. The Object Output is a thin wrapper over AVFoundation's AVCaptureMetadataOutput, and the cross-platform Barcode Scanner runs ML Kit. The only library in this guide that uses VisionKit is react-native-data-scanner, on iOS.
How do I prevent the scanner from firing multiple times for the same code?
Live camera scanners report a code on every frame it's visible; that's by design. In expo-camera, set onBarcodeScanned to undefined after the first hit. In VisionCamera, debounce in JS or flip isActive off once you've accepted a code. With react-native-data-scanner this can't happen: one scan, one result.
How do I turn on the flashlight (torch) while scanning?
In VisionCamera, set the torchMode prop on <Camera /> to "on". In expo-camera, set enableTorch on <CameraView />. With react-native-data-scanner the OS scanner UI is in charge; on Android, Google's scanner ships its own flashlight toggle.